Thursday, 26 March 2015

My kitchen rules (in my opinion) - part two

So as I discussed in my previous post (you can read it here) we put in a new kitchen before we moved in with the help of Kitchennet in Drummoyne.  They organised all the cabinets and trades for installation - but to lower some of the costs I sourced the appliances and also the other essential items.

Be warned - when installing a kitchen - don't forget to ask about what is (or is not!) included.  Things that are necessary but might not be included are -

Tapware - 

There are lots of types and choices.  Mixer taps are the type of taps that have a single unit, and you lift the lever on the top of the spout itself to turn on, twisting to either side for hot or cold.  I think most taps seem to be this type now.  I didn't really see any or many units with a spout and two separate taps, and those really old fashioned ones with two separate taps and spouts don't seem to be around at all.

Mixer tap which is quite common

Old fashioned two separate taps

But we had to get the top of the line tap (of course).  My husband is a great cook, and enjoys spending time in the kitchen (which I encourage!)  He was keen on what is known as a mixer tap with vegetable spray.  Basically you have one part of the spout over the sink and another part that pulls out of the holder and is flexible, and can spray your vegies, or salads, or anything really.  You can get some mixer taps that pull out and retract, but I have been told that they sometimes may no longer retract after a some use.  So our tap is taller, but will not need to retract at any time -

 
The famous tap - one spring out arm with spray, the other fixed arm (although it does rotate) for getting a glass of water

It really is great.  I can fill up tall vases and rinse out the bins so easily.  I know they look a bit strange and my parents complain they can't just get a drink out of it but I recommend them if you can fit them in!

The cupboards had to be moved upwards to fit the tap in
We actually even had to change the plans for the kitchen to raise the cupboards above the tap - but there was never a question in my husbands mind, we were fitting it in somehow!

Sink

You would think that was a given in the kitchen plans, but turns out that you have to pay extra for this too!  And then there are more choices than I expected.

First of all you can get a drop in sink or an undermount sink.  Drop in is the type with a draining board as part of the unit, and as it sounds, you "drop it in" to a hole in your benchtop.  The metal part of the sink sits on top of the bench top.  You can get all different configurations - single bowl, double bowl, single and a half bowl, left draining board, right draining board, double draining board - it goes on and on.  With a drop in sink, there is often a tap hole already cut into it, so you are limited to that hole what type of tap you install.  (Generally this will be a single hole in the middle of the sink, so a mixer tap will fit)

Double bowl sink

Single bowl right drainboard
Reece Bathrooms - this is a Franke Granite sink
Reece Australia -  Franke drop in sink
Obviously space is an issue for this - I always think two bowls are helpful so you can tip out water or rinse out in one bowl while washing in the other.  But it depends on your kitchen. You need to measure up carefully to see what you can fit. And also think about how you prefer to wash up or what is around your sink which might affect which side the draining board goes on.  As these pictures show, there are different shapes and materials as well that you can choose from.  Lots of websites have good choices, but Reece and Clark both are good places in Australia to have a look at.

Then you have undermount sinks.  Again, the name is a hint.  These sinks attach underneath your bench top so all you see is the benchtop, a smooth edge and then the sink bowls.  Some people prefer the look of these, as you don't have a drain board to collect grime.  You also have more bench space. However when washing up you still need to put your dishes somewhere so you need to think about a draining rack etc.  I assume you would only really do this with stone bench tops, as a laminate bench top would not look as attractive on the edges.  When the stone bench top is cut your stone mason will need the sink so it can be attached.

Undermount sinks can be single or double bowls, and also come in different shapes and sizes.

Fusion
A single undermount sink from Clark
We chose the double undermount sink, which I think looks nicer, is deeper than other sinks, and has plenty of room.  We also got a built in colander with it and you can buy other draining boards to use with these sinks, to cover one bowl.


One side of our undermount sink - I think it has a nicer finish on the edges.  The other side is full of dishes so no photograph today!

Splashback 

You can choose many different materials, but check it is suitable for use, particularly for ceramic or gas cooktops - a melted splashback would not look good.  Tiles are often used, but you can use glass, acrylic, or even just a painted wall.  And of course there are a multitude of choices in tiles.  For our kitchen our tiler was included in the price but not the tiles! I ended up choosing very plain white tiles, with a trim of grey mosaic tiles.


Plain white tile splashback with grey mosaic tile trim

Handles on cupboards or drawers

Again - I would expect these to be included but they may not be.  So check!  And same as tiles and really all accessories - there are many choices ranging from basic and less expensive to much more expensive.  Handles can often be changed at a later date if you want to give your kitchen a bit of a make over.  I don't really see the point of spending a lot of money on them, but I'm sure some people do!


Appliances

The final thing you need to buy and consider - appliances.  Again, prices can vary greatly and you can buy all different sizes and types.  This is going to depend on your situation (a family may need a bigger fridge than a single person, or a person who loves baking may want a bigger and better oven) and of course your price range.  You can make your own choices on appliances - but you will need to consider and buy - an oven, a cook top (or an upright cooker combining both) and a range hood.  A dishwasher is very common but not essential (although I couldn't live without mine!)  And although you might already have a fridge, you do need to consider the size to make a large enough space.  So if you're going to buy a new one - decide before you get the kitchen made!

We were lucky enough to be able to use my parents old Smeg oven, which was given to us for free. I purchased a Bosch glass cooktop from The Good Guys and bought the floor stock to save some money.  The Bosch dishwasher came from Harvey Norman on a super Saturday sale.  And the Blanco rangehood was also negotiated from The Good Guys.  Shop around for the best prices and some places negotiate more than others. 

Blanco pull out range hood

My favourite appliance - the dishwasher

We ended up getting a bigger range hood than necessary - originally we thought we would put in a donated 90cm cook top so needed a 90cm range hood to go over it - but then later we changed to a 60cm cook top.  Range hoods can be pull out or fixed (you pull out one section to make them larger - my preference) and can also be the canopy type that seem most popular in all the magazines I read.  Best to do your research depending on what you can fit in (can you duct it outside?) and so you don't knock yourself out every time you are cooking.

And one final thing - which I will go into more detail on a separate post- do your research on your necessary purchases.  I bought our taps, tiles and sink at the Sydney Renovator Auctions.  This place is fantastic and so much cheaper than other retail outlets.  I paid $300 for the sink, approximately $300 for the tap, and $4 per square metre for the tiles.  There is a buyers premium added but it was still significantly cheaper than buying retail.  Some of the sinks I have pictured above cost between $1600-$2000 just for the single or double bowl!  Taps can also easily cost hundreds of dollars.  While you don't want to buy cheap rubbish that will leak immediately, you can source good quality items.  Our kitchen guys and plumber couldn't believe the prices I paid, to the point they tried to buy the tap and sink off me!  I also bought toilets and vanities (posts coming up) at a reduced price.


Sunday, 22 March 2015

Weekend DIY projects

Well I did say the next post would be the continuation of my kitchen post, and I am working on that, but first I wanted to show off some of my handiwork from this weekend.  

I felt very productive yesterday, not only knocking over some of the work for my day job, I managed the pre-study for my St John's Ambulance first aid course AND I got started on a few of my new projects.

First up - trying to cut out some tile pieces in the bathroom.  This one wasn't too successful.  For reasons that will be explained in later posts - we have a large gap in the tiles in our bathroom. 


Badly lit photo of the missing tiles in the bathroom
  It seemed like an easy job to fix - just cut out the grout (with my very recently purchased new multi tool) and then replace with two new tiles.


All I needed to do is cut that small piece of tile out

Grout is cut but I don't know how to get the adhesive off
So I managed the cutting of the grout - but I can't get the pieces out!  So I rang my brother (my dad is on a cruise overseas at the moment, so the little brother had to be the go to DIY advice person) who said he thought I needed a cold chisel.  And yes, for a fleeting moment I wondered what Jimmy Barnes had to do with it....  (probably something only Australian readers will get there.  See the link at the end if you want to catch up on classic 80's Aussie rock).

Anyway, I have to admit I've given up on that project until my dad does get back to help me out.

But I had more success with my gardening.  First I planted out two new hanging pots, and have hung them on the verandah, along with my lanterns I bought from Ikea a few weeks back.

www.crookedcottage.com.au


Then I got my painter on - and channelled Tara Denis - I saw her do this on Better Home Gardens a while back - by spray painting an old plastic pot to re-use for my new lemon tree. 

The pot previously looked like this - 


This was taken before we settled on the house - the pot I painted is the one of the far right, the dark green colour one.

And after my painting - 


However one tip - I used my shade cloth as the protections between pot and pavers.  Not such as great idea - it's not exactly protective - so I now have some blue marks on the pavers that I am hoping will wash or fade away!

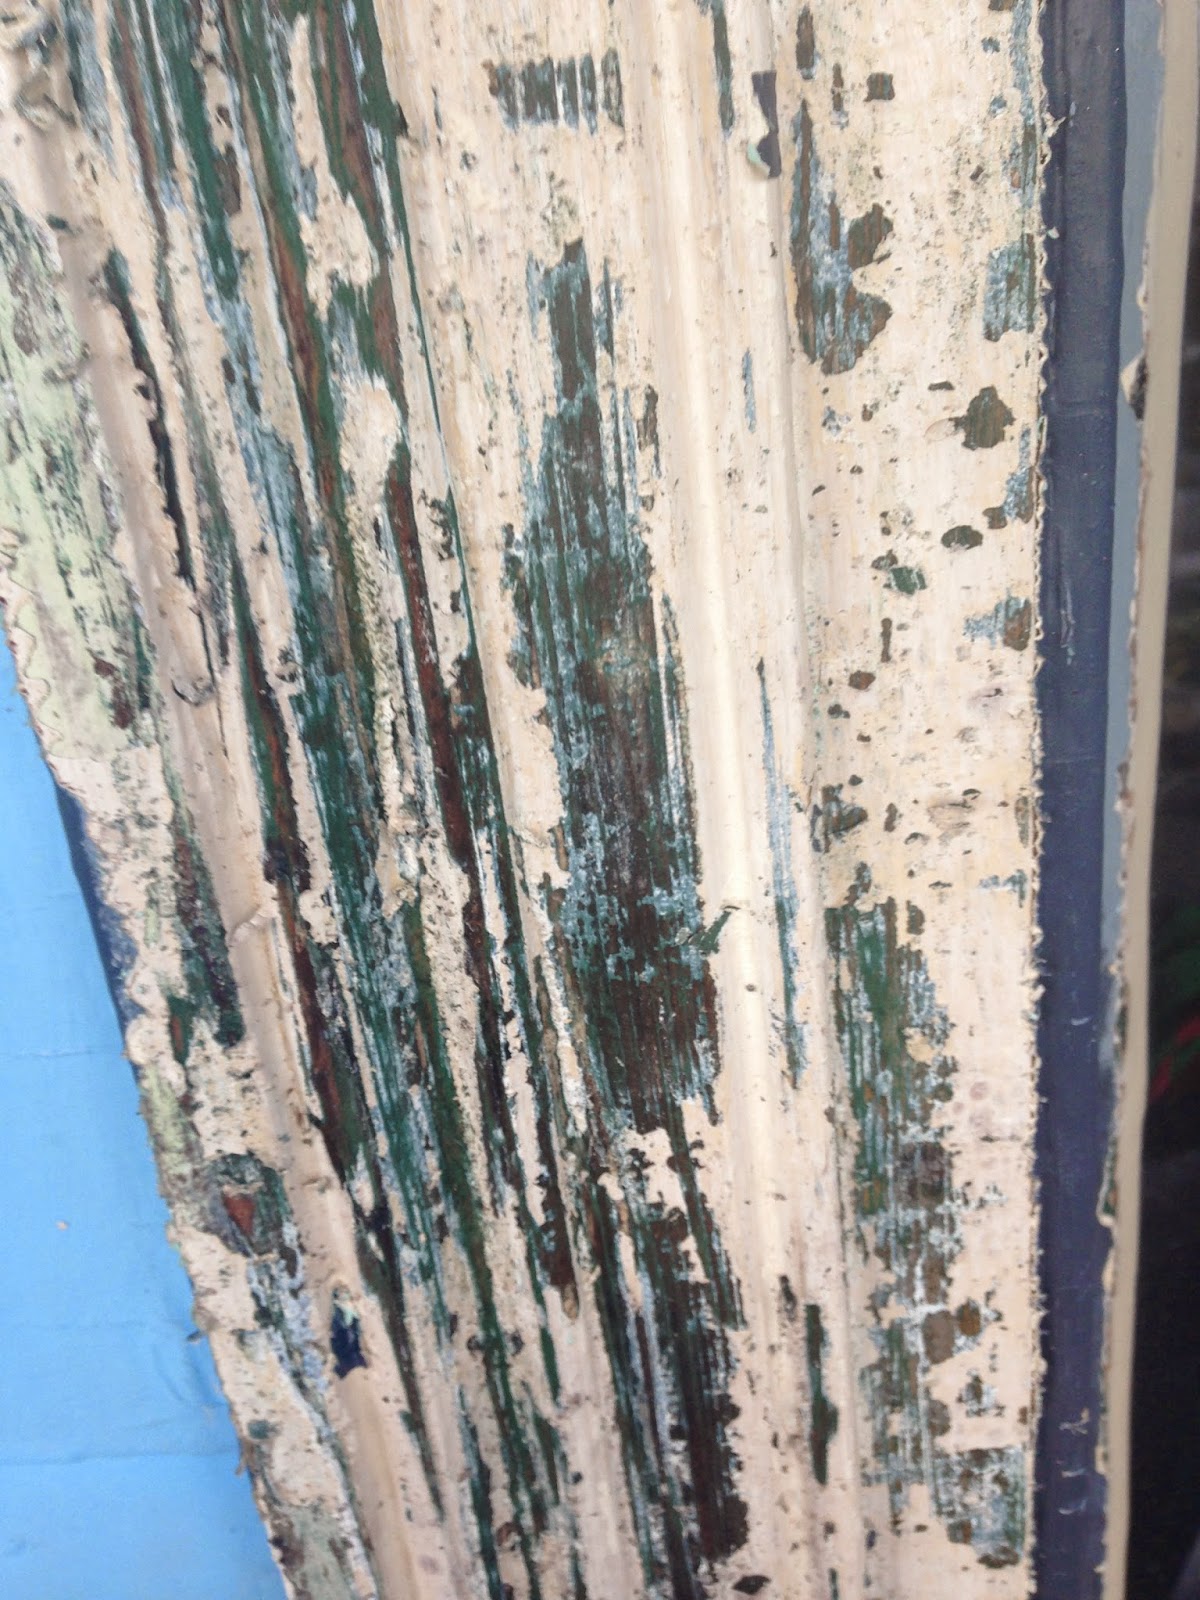
And after my painting project, I also decided to start on another project - the stripping of the paint on the sash windows.  I could tell the paint that was there was not very well done, as it was already lifting and cracking in places.  So I bought myself another new toy - a heat gun - and got to work.  Mind you - safety first - I got a respirator and heat protective gloves.  And then I got stuck in.

My new toys - heat gun, plus my safety equipment - safety is very important!
The current paint job is a blue colour, but is already lifting and cracking in some places

A heat gun is a magical thing!  It looks like a hair dryer but after a few passes over the paint it bubbles and softens - and can be easily scraped off.   No wonder the blue paint was already cracking - it seems like it went straight over a cream layer, which was over a light blue layer, and then a green layer - all just on top of the previous one.


So it would appear there are about four layers of paint to be stripped right back

So I haven't got very far through it yet, although this was only about 25 minutes work before it got dark.  So hopefully by Easter I can strip both windows back totally, and then repaint.  I would definitely recommend using a heat gun for stripping of paint!

And now because I promised to educate you about Cold Chisel  - here's a clip of one of my favourite Chisel songs - Flame Trees


Tuesday, 17 March 2015

My Kitchen rules (in my opinion) - part one

As I discussed in an earlier post, kitchen installation took longer than I would have ever expected!  I had thought you went to a showroom, picked some colours, drew up a plan, and maybe had the kitchen installed in a week or two.  Clearly I was wrong!

The house had a sort of functioning kitchen when we bought it, but it was definitely our plan to put in a new and updated kitchen.  I decided that this should be done before we moved in.  I had visions of moving in, and then it all being too much to unpack the cupboards again and the kitchen never being fixed up.  Many people said we were better to move in and live with the kitchen for a while, so that we got something really practical and that suited us, but with the previous owners keeping their fridge in the laundry (who knows why?) and the cupboards and cooker being grimy and disgusting I did not want to even think about that option.

This is the kitchen which was originally installed - pictures taken prior to us settling

Original kitchen which I didn't fancy keeping


So we started our visits to showrooms about six weeks before our settlement.  I thought this would be plenty of time.  The first showroom we walked into was gorgeous.  Everything was top of the line - 40mm stone tops, automated cupboards that opened with a press of a button (so you don't have to lift your arms above your shoulder!) and all other mod cons you can think of.  Then of course the big question - how much?  As I didn't really know how much kitchens cost I was a bit wary of the "what is your budget?" question - however when we were told the starting price for their kitchens was $35,000 we realised the high end was off the list for us!

Second place was still lovely, but slightly less expensive.  However, they imported all their cupboards from France (or perhaps Germany) and so the earliest they could hope to get cupboards was 8 weeks - with a probably delivery time of 8-10 weeks.  So off to the next showroom.

Finally, we found Kitchennet in Drummoyne.  We were really happy with them.  The initial visit we were looked after by a really helpful woman (whose name I have forgotten, which is bad as she was really very good at customer service!), who didn't mind us asking about the less expensive options.  Although she couldn't give us an actual price, as we were talking about the use of laminate and given our kitchen is only one row of cupboards and an island bench, they were confident we could get a lovely kitchen with relatively lower expense.

The next visit was to meet with the designer.  John was very helpful, and had actually accessed the house plan through the real estate site when we bought it - so had already drawn up some suggestions.  We were happy immediately with this plan, so could go ahead and have it drawn up fully.  Again the question of budget - I was still a bit wary and so I said we were looking at $10,000 but that we would buy our own appliances.

So the final plans were drawn up - and amazingly (or perhaps I am being cynical, but it did seem a bit of a coincidence) the quote was just under our budget - $9700.  I really do wonder if I had have said less money the quote would have fallen under that amount!

For this we got two 900mm drawer systems, 3 other underbench cupboards, plus an above fridge cupboard, pantry cupboard, and 5 other high cupboards, plus the cupboards above the rangehood. There is also an island bench with space to sit at.  All hinges are Hettich, and the drawers are soft close. Overall I was quite happy with the price and the plans.

This shows the kitchen with sink cabinets, drawers, oven (which we supplied) and one of the underneath cupboards, also on the other side you can see our island bench, which consists of drawers and a sitting area

The drawer organiser which also came with the package has been very helpful

We went for laminate cupboards, and initially we were going to have laminate bench tops. We chose white for the lower cupboards (I think the colour is Ash White) and for the top cupboards John suggested that we use a contrasting colour.  We chose a woodgrain finish, and the colour is Alaskan. We were going to use a dark grey colour for the bench tops.  When we were deciding however, we were offered a deal to use 20mm stone for the bench tops and it was only $600 more than the original quote.  We decided on Smart Stone in Marengo, however in the end this was out of stock and so we ended up with Caesarstone Raven.

You can't really tell but the upper and lower cupboards are different colours

Stone benchtops in the dark stone colour

In addition to the increase for the bench tops, we also had to pay more as I wanted a double under mount sink, and there was a slight variation for extra cupboards.  So the final amount for the kitchen was around $11,000 - including all trades and installation, and removal and disposal of the old kitchen, but not including the appliances or the sink and tapware, all of which I sourced myself.  I will write another post regarding buying of appliances and tiles, and approximate costs involved.

Tuesday, 10 March 2015

The renovation time line - part two

I have already written about the time involved with some of our renovations, including the kitchen from planning to installation, painting, and polishing the floorboards.  You can read about those processes here.  While some of this did occur at the same time (for example, we continued to paint rooms while the kitchen was being installed, and even afterwards) we did have to complete it in some order so that each trade could do their job consecutively.  

Other jobs could be done whenever suited us, and did not rely so much on other trades.  It still may be useful though for people to have an idea of what is involved, as a couple of these tripped me up a little!

1.  New skirting boards - these we bought from Bunnings (I usually would prefer to support local businesses but this was just easy and they had plenty of the profile we wanted).  I didn't realise there were so many types you can buy - different widths, profiles (the slope of the wood at the top) and probably other variables as well.  We bought pre-primed boards, and my dad has a mitre saw so was able to cut them so that we could join neatly in the corners and on the long strips.  Youtube was quite helpful in showing me how to do this!


2.  Fixing the sash windows - when we moved in our original double hung sash windows had broken panes of glass, and the sash cords were broken so they did not even open.  One of my husbands friends is a glazier - helpful to call in your mates!  He arrived on a Saturday morning to fix them for us - replacing all necessary panes of glass (I think three panes altogether) and fixing the sash cords, plus sanding them so they ran well and now open beautifully cost us about $300.  This may have been mates rates though.  
One crack can be seen in the glass panel here

The second glass window also had a crack although this is difficult to see here
One thing I did not realise with the windows is that the putty that is used to put in new panes of glass needs a few weeks to really set.  We were told to wait a month before sanding and painting.  That has now extended to almost a year!  We will get there eventually.....

3.  Hiring a skip - even this can have issues.  When you live on a narrow street like ours you do need to be conscious of taking up room in the street!  Some large skips also require council approval.  I hired one which was on a trailer, and so could be parked on the street - but it still required pre booking and trying to arrange for parking out the front of the house.  I got a lockable skip as I had heard plenty of stories about neighbours filling up skips after dark - however in the end that doesn't seem to be an issue here, as our next door neighbour has an almost permanent skip outside which he happily lets everyone use!  (haven't paid for my own skip since.....)
4.  Carpet installation - carpet is more expensive than I expected.  I had previously had carpet installed in our apartment when there was water damage, and although the insurance company had covered most of this the entire apartment had been carpeted for approximately $1800.  So when I only needed to carpet one room (although one large room, with unusual lay out) I expected it would not even cost this much.  Obviously my previous carpet had not been very good quality!  There are many different materials, basically divided into synthetic material or natural materials such as wool.  But even within each class of materials there are a large number of variables.  Carpet can range in price hugely, with a fairly cheap price being around $20-30 per square metre, but I assume it can range up to many hundreds of dollars per square metre.  You also need to be careful - often carpet is sold by the lineal metre, so be aware of your measurements and the differences in prices.


Can't really see the old carpet so well but trust me it was horrible!
The other thing I did not realise was that when you look at carpet in a showroom - that does not necessarily mean they have enough in stock to install within a short time period.  As I wanted to have the carpet installed prior to us moving in I had quite limited time available for measure and quote and then installation.  The first company I spoke to did not even bother to turn up at the arranged time for the quote.  Luckily I had already decided they were too expensive, and had been to Webber's Carpets to see what they could do for me.  Because I needed it installed the following week there were limited carpets I could choose from, however they did have a number of rolls with enough stock so that I could choose and pay a deposit on Friday and then have it installed on Wednesday.  This is not usual - generally I would say give yourself a few weeks at least to allow for quote, ordering and installation!


Lovely new carpet installed
The carpet I chose is pure wool with a cut and loop design, so that movement of furniture and vacuuming will have limited impact on the pattern.  I went for a grey colour as it is fairly neutral and will hopefully not date.  The upstairs bed room is an unusual shape, and includes the cupboards.  When calculating a price for the carpet you also have to take into account the underlay and installation cost.  In the end, our total price was around $2400 fully installed for the one room.


Thursday, 5 March 2015

A productive trip to the Orange Grove Markets

The Orange Grove Markets are a weekly tradition for many people around Rozelle and Lilyfield, and with good reason.  They are organic farmers markets, so the emphasis is on organic produce and locally sourced food.  There are also a number of bakeries, and other meal producers, so you can also pick up all the essentials like cronuts, delicious gluten free baked good, olive oil, dips, and lots more!

But I was there for the plants.  I had been told you can get citrus trees for a good price, and I really want to get a few - my mother in law has even promised to buy them for me for Christmas (yes I know it's March.  We are just a bit slow!)  So I went to check it out.  You can indeed buy citrus trees, many with a lot of fruit, for around $35 for a dwarf lemon or a lime tree.  All great - but I walked there, and it's a good kilometre or so.  So if I'm going to buy up I need to have a plan for how to get them home - that will be for the next visit.

In the meantime though - I found the seedlings.  And who can resist a bargain?? So I started buying.  Then I got offered a box to carry them in - so I really had to fill up the box to make it practical to carry home....


Not sure about the angle but that is the box full that I lugged home - it is a longer walk than you think when you're carrying a lot of plants!

The spoils of the day were -


I've never eaten kale - and I don't think I could stomach a green smoothie - I was told to saute it though and it's really tasty

Kale - the current super food favourite.  Apparently grows well over the cooler months, and is ok in part shade, so will be going out in the back yard.


Six little celery seedlings

Celery - it also seems to like the mid seasons.  I think I have to do a bit more research on this, to blanch the celery so it grows tall and not too bitter - but for now it is in the part shade areas of the garden and we will see how we go!


Rocket - every salad needs it.  I tried to grow this from seed and wondered what happened to the seedlings  - now I've seen that slug (read about it here) I think I know!  But these are bigger plants already so hopefully survive.  It's gone into full sun in the front yard.

Coriander - I love this herb but it often seems to bolt easily.  I realised perhaps last time I had it in too sunny a spot, so this time it has gone out the back under my clothesline - this might let it stay more leafy for longer I hope.


Dill - always makes me think of a nice fish dish.  So giving this a try for the first time.  It appears to need full sun and can apparently grow very tall, so it is at the back of the beds in the front yard.


The mizuna got a bit squashed on the trip back home

Mizuna- I bought this not even knowing exactly what it was, but I needed an extra herb to make my 5 plants for $10.  I'm glad I got it though - it sounds tasty.  Also known as Japanese mustard, the leaves are supposed to have a mustard or peppery flavour.  Also a leafy salad vegetable, these grow in part shade, and smaller leaves will be more tender and more tasty (or so I have read!)

Chives - always a kitchen staple.

So all of those cost me $17 - $10 for 5 for the herbs (including rocket and mizuna) and the celery and kale were 6 seedlings in a punnet, and 2 punnets for $7.  Bargain!

 In addition to those I had also made a sneaky trip to a nursery on my way home from work on Thursday, so I also had four six cell punnets to plant out (they were buy one get one free - couldn't resist) - so in addition to all those I also now have curly lettuce, leeks, dwarf broccoli and spinach which has been planted in various pots and garden beds around - hopefully in the not too distant future I will have a veritable salad bowl in my garden!

Plus, tomato and capsicum plants self seeded and have sprung up when I moved my compost heap - so I have transplanted them to pots, and if they survive I will perhaps replant into a larger pot or into the garden bed for some late season fruit.


Lovely marigold

Begonia

Blurry pick of my possible snap dragon


Then to fill up the box I decided to get some colour - needed to replenish my hanging pots.  A petunia, alyssium, marigold, snap dragon (I think!) and a blue plant that I don't actually know the name of all went in - they were also 5 for $10.  So for a grand total of $27 I had more plants than I know what to do with - and had to carry them all home!!


The last thing I bought was two bunches of dahlias - because who doesn't love brightly coloured fresh flowers?