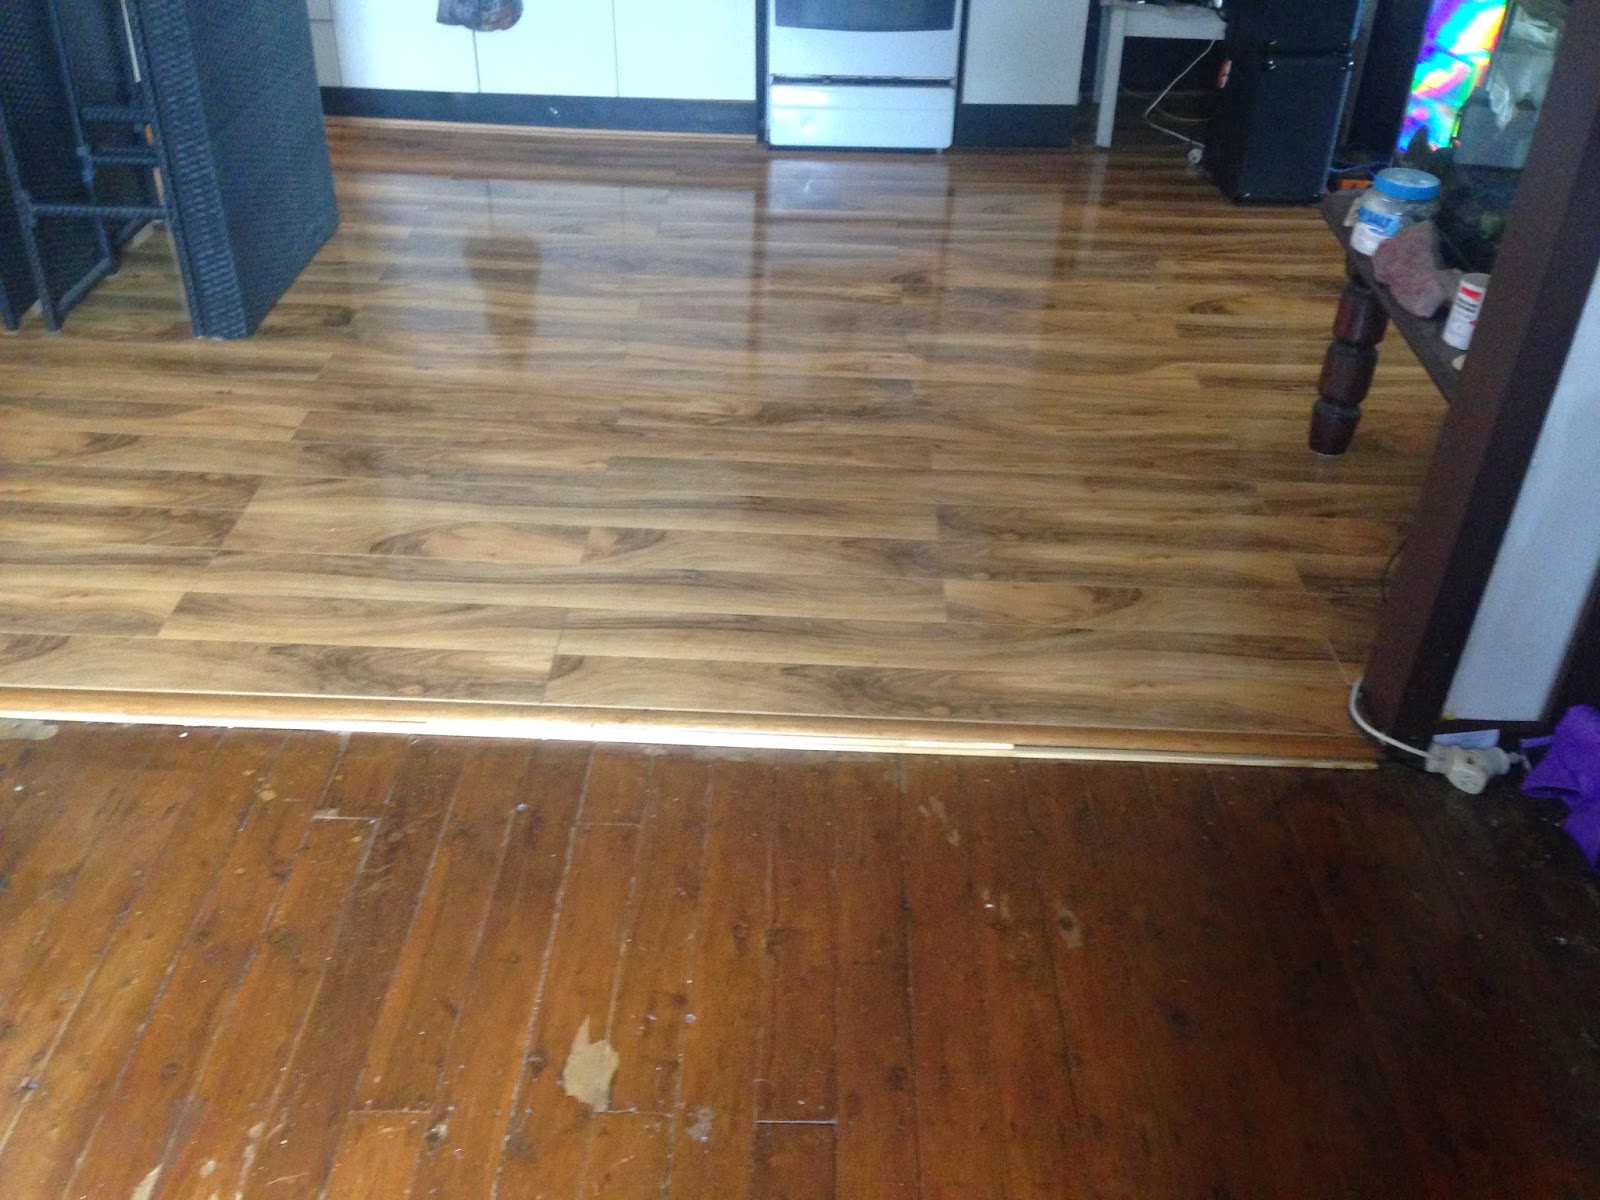
One of the things I liked about the house when we bought it, and something that is often referred to in real estate speak is "original floorboards" throughout. We could see that there were floorboards in the spare room, lounge room and dining room, and although it was covered up with a fairly new looking laminate floor we were pretty sure there were floorboards in the kitchen too.
 |
| Quite a good shot to show the old floor in the dining room and where it met the new floor in the kitchen. The high shine part was laminate type floating floor. |
 |
| The old floor boards were not in great condition and had a lot of dirt and paint but they were still sound, no breaks or holes in the boards themselves. |
So we decided that it should be fairly straightforward to lift the floating floor ourselves, and we had assumed that we would find the same floor underneath. The laminate had been laid in a fairly slap dash way, the edges were certainly not what you would call professionally finished.
 |
| As you can see some small pieces were added at the end of the floorbards and then just a strip of metal or wood nailed down to "finish" it off |
 |
| This was as we started to pull it up - a lot of small pieces of wood and the boards themselves were ripped up. |
The first layer was not too hard. The laminate flooring clicks together and also clicks apart, so with the help of a crow bar (well like a crow bar but flatter and smaller, not sure what the technical term is but I called it our lift bar) and a mallet we were pulling them up easily. Note I said "first layer". The kitchen guys had already measured up our kitchen and had mentioned that there was 20mm difference in floor height from one side of the kitchen to the other. As everything in this place is so crooked we didn't think much of it initially. Turns out, it could have been any one of the 5 + layers of flooring under there which was uneven!
 |
| Not the best focus but this shows the second layer (and our mallet) - lino tiles. |
 |
| These are lino tiles, so each square is a piece of lino which was glued down. |
So second layer - lino tiles. And who knows how long ago they were stuck down, but the glue was still pretty sticky!
We started ripping this up, which mostly just involved getting and edge and pulling.
 |
| The lino tiles were stuck down onto a type of chipboard. Note the damage around the stove, probably old water damage. |
 |
| Another shot of the first layer of chipboard, with some of the lino tiles still stuck. There was water damage around this wall as well. |
The chipboard was hard to get up, it was in larger sheets and was quite heavy.
 |
| Next layer was another layer of lino. |
We were starting to feel a bit like we were unwrapping babushka dolls - a floor under a floor under a floor (and repeat). This layer was another layer of lino, a kind of yellow colour with a pattern on it. It was full sheets of lino, not in tiles. It had been stuck down directly onto a third type of lino, I don't think I have any photos of that one as the glue was still quite strong and as we ripped up the yellow lino we took the other one with it. The final layer was another layer of chipboard. By this stage we were getting tired and cranky - what had been expected to take us an hour or so maximum was up to 3-4 hours. And we hadn't found the floorboards yet! But as the chipboard came up we found -
 |
| Finally - we found floorboards! And in surprisingly good condition, especially considering the water damage we had seen. Maybe all the layers were good protection. |
 |
| But another snag - there were only floorboards under 3/4 of the floor - the rest was this large piece of board, put down over what was probably previously a verandah. |
So we finally found the floorboards - with two fairly major issues. The biggest one was the lack of floorboards in one whole section of the floor. Can't exactly polish up a big piece of board and hope no one notices. We needed to put in a floor and we needed it within five days, as I had already booked the polishing in! The other issue was the staples in the main floorboards. Thousands of tiny little staples which all had to be removed by hand, without marking the floor.
The first issue was solved by the company we had already booked to come and polish the floors. I rang them in a panic to ask what we could do, and they sent me Julius. Julius is a very deaf carpenter, who we struggled to communicate with - but since he could see the problem fairly easily when he arrived we didn't have to explain much. And he worked magic. He sent my husband to buy reclaimed floor boards from a local timber place - Rozelle Recycled and Ironwood - they have a number of different timber and stone retailers there, including one that sells reclaimed boards - a great place to look for building materials. And then Julius was able to come in to do our floor the next day, and built a floor for us from scratch.
 |
| Underneath the piece of board was only rubble, no joists or any support at all - no wonder the floor was at different heights in different places. |
 |
| The joists were built with treated pine. The rubble we removed by hand - although I didn't touch the mummified rats we found under there, those were shovelled into the rubbish! |
 |
| And once it was done, you could barely see what was "new" floor and what was old. The use of reclaimed floor boards (these are cypress pine and about 85-90mm wide) meant it blended in. |
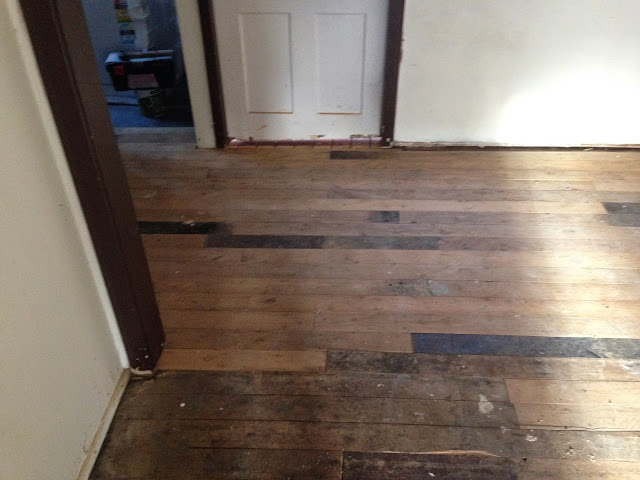 |
| In this picture you can see a little more obviously where the floor was built - however later when it was polished you can't tell at all. |
I can't speak highly enough of Julius and the fact that he saved our floor - and us!
The staples were another question. We all took turns at trying to prise them out, and gradually removed most.
 |
| Each of those little marks is a staple, many with chipboard still attached. I guess whoever put it down didn't plan on ever seeing those floorboards again. |
 |
| I have no idea why they used so many staples. But they all had to come out to be able to polish the floor |
The staples were prised out gently using long nose pliers. I tried other tools, particularly after requesting suggestions from my friends on Facebook. I think my cousin gave one of the best pieces of advice when he said
" With each job there is an easy way and a hard way. You can never have enough tools. Take this dilemma down to your local hardware store find the oldest fella with the roughest looking hands and ask him for advice"
Pretty much was what I followed for the whole renovation process! (Thanks Ben)
The next post will cover the polishing of the floors - and how they came up in the end!