Showing posts with label renovations. Show all posts

Monday, 13 June 2016

Beginner's guide to painting weatherboards

I haven't blogged for a while - too busy actually doing things to the Crooked Cottage!  As I posted about last time, we had our new balcony installed - and it looked fantastic.  I paid someone to paint it, as I didn't fancy (or even know how) to climb up and paint the sides and the fencing around the balcony itself.  

And then it looked so nice I had to do downstairs as well!

So I will post about the actual construction of the new downstairs facade at a future point.  Suffice to say it's done, it looks awesome and now we come to painting.

Being a tightarse frugal person I decided that I could paint the weatherboards myself.  Apart from a ladder there is no particular equipment needed, and I knew it would save us a significant amount of money.  Also as all the boards are brand new there is minimal prep work required.

Through trial and error (and also copying some of the professional painters tricks) I have some tips for anyone else who is going to give this DIY painting a go.

1. Prepwork sucks but it is important
Although I didn't have to sand the new board or strip any old paint, I did have to patch all the nail holes and then clean all the boards as they were dusty and dirty (I still don't have a verandah roof). The better prep you can do the better the finished product.  

Trying to keep the light protected by wrapping it in a plastic bag

2.  Put your painting trays inside large garbage bags
This one I stole from the professional guys.  If your paint trays are like mine and full of dirt from the shed, or remnants of old paint colours then it is much easier and less cleaning.  But the main saviour is the wash up and the environment - when you are done you can just pull the garbage bag off and put it in the bin, no washing up and risk of paint going into drains.  From experience - if you keep the same garbarge bag you probably need to peel the dried paint off first - I had a bad day with little scraps of dried up paint going on to the weather boards so after that I went to just one use per bag. 


3.  Keep a bucket of water to put your brushes into
If your brushes get dry they seem to not work so well.  They get a bit clogged up.  So if you have a few brushes, rotate them and throw them in the bucket in the mean time.  Also once you are done put all the brushes and roller covers into the bucket - nothing worse than ruining all your brushes (yes, I've done it many times) by not washing them out properly and finding them stiff as a board the next day.  The bucket manages this issue and the water can be discarded somewhere safely (not down the drain outside as that goes straight into our harbour!)

4.  Brush the paint on first then roll it
Well this one worked for me.  Brush into all the gaps, edges, and then across the whole weatherboard.  Then you can get the roller and make the finish more even and nicer by rolling up and down but no cracks are missed.  

So it's a slow job but I'm hoping the end result will be worth it!

Sunday, 5 June 2016

Garden Share Collective May 2016 - Leaves

This month's Garden Share Collective comes around again and the theme is Leaves.

Which is a pretty apt theme for my garden - as that is about all I have at the moment.


I had hoped to at least take some nice photos of the garden and of the house but unfortunately due to the crazy storms in Sydney (and everywhere on the east coast) I have been spending all day trying to mop up leaks, and spinning and drying wet towels in front of the heater.  So no nice pictures!  But I do want to get it out in time for the link up, so I apologise for the non aesthetically pleasing post!
The radar for this evening - more rain coming.
I am still doing renovations with new weatherboards put up all around the front of the house.  This has meant most of my pots have been moved to the back yard, where they get limited sun, and being winter anyway not much is growing.  The only things that are going well are some of my bulbs and of course my weeds!

The tree in the back neighbours place is some type of gigantic oak tree and is the bane of my existence, as it is always dropping leaves.  I'm forever sweeping them up at the moment.  And that is all the activity I have been having in my garden.

My renovations are almost finished, and I have been painting on all my weekends when it hasn't been raining.  So there has been no time for gardening.  I also haven't yet been able to visit the Community Garden, although I have been in contact again, as I have to go at a time that I can meet with some members, and haven't yet been able to co-ordinate my times. 

However, I am hoping that next month I might get back into the garden.  Since my renovations are fininshed, I now want to work on the garden beds.  They somehow seem smaller and lower with my new verandah.  So I am thinking of building all the garden beds up, and putting in a new bed on the north side of my yard.   I will also be digging in my sprinkling system so that it is drippers under the beds rather than the current sprays above the ground.  So that will probably end up quite a bit job!

So this month will realistically be no gardening.  But maybe just some digging in of compost, tidying, and planning will be on the cards.

Looking forward to seeing what everyone else is actually getting done in their gardens this month!

Friday, 10 April 2015

It was (one) year ago today -

Well today I was reminded (by Facebook,  which seems a bit wrong that I now rely on social media to remind me of my life events) that one year ago we were just ripping up the floor and having our panic attack about the missing section.  It was the second day we owned this lovely house and things have certainly changed!  Mind you, there is still plenty to do. 

So as an anniversary present to myself and the Crooked Cottage, here are some before, during and after shots, just so I can remember we really have achieved quite a lot.....


 The lounge room as it was with the previous owners lounge and artwork up - looking from the spare room into the lounge room.

Slightly different angle but the same room now - looking from the spare room into the lounge room - my Florence Broadhurst wallhanging (made by my mum from a piece of fabric I bought at Signature Prints) is much nicer!


 Still working on getting the windows painted and some proper tie backs for my curtains, rather than the current pieces of cheap ribbon!


 The old kitchen - brown and beige colour scheme with fake timber floor and all.  Plus the island bench which was really an outdoor table.  

Via this - after floor taken up, but before we wrestled the million staples and the asbestos got removed
To this - much nicer colour scheme and you can just see the nicely polished floors.

The bathroom also has been given a full make over - from this when the asbestos was removed

To my lovely all white tiled to ceiling bathroom, with the sort of over large vanity (probably didn't need a 1200mm one there).   That window is not current though - it's been replaced after the great council debacle......


And outside - well the palm trees are gone, along with the crappy white rolled up blinds

 The ugly hanging fern and it's green pot have been replaced and prettied up too


 The green pot got painted grey and the horrible half dead fern replaced with some petunias (which I admit are also half dead now - hanging pots are too easily forgotten!)


 We have a great security door - nothing can get in there.  But the blue colour walls are still there - which wasn't really part of my original plan!! That might be the next thing to be fixed up....

So I will have to do another post in one year from today - who knows what else will be fixed up by then?! 

What do you think the next job should be - painting outside, finishing painting inside, fixing the fence (including removing the green paint that the previous owners painted over the sandstone - why??), building a seat on the deck - or do you have other suggestions?!

And please feel free to click on the link for Facebook and "like" my page, I would appreciate the support!

Sunday, 22 March 2015

Weekend DIY projects

Well I did say the next post would be the continuation of my kitchen post, and I am working on that, but first I wanted to show off some of my handiwork from this weekend.  

I felt very productive yesterday, not only knocking over some of the work for my day job, I managed the pre-study for my St John's Ambulance first aid course AND I got started on a few of my new projects.

First up - trying to cut out some tile pieces in the bathroom.  This one wasn't too successful.  For reasons that will be explained in later posts - we have a large gap in the tiles in our bathroom. 


Badly lit photo of the missing tiles in the bathroom
  It seemed like an easy job to fix - just cut out the grout (with my very recently purchased new multi tool) and then replace with two new tiles.


All I needed to do is cut that small piece of tile out

Grout is cut but I don't know how to get the adhesive off
So I managed the cutting of the grout - but I can't get the pieces out!  So I rang my brother (my dad is on a cruise overseas at the moment, so the little brother had to be the go to DIY advice person) who said he thought I needed a cold chisel.  And yes, for a fleeting moment I wondered what Jimmy Barnes had to do with it....  (probably something only Australian readers will get there.  See the link at the end if you want to catch up on classic 80's Aussie rock).

Anyway, I have to admit I've given up on that project until my dad does get back to help me out.

But I had more success with my gardening.  First I planted out two new hanging pots, and have hung them on the verandah, along with my lanterns I bought from Ikea a few weeks back.

www.crookedcottage.com.au


Then I got my painter on - and channelled Tara Denis - I saw her do this on Better Home Gardens a while back - by spray painting an old plastic pot to re-use for my new lemon tree. 

The pot previously looked like this - 


This was taken before we settled on the house - the pot I painted is the one of the far right, the dark green colour one.

And after my painting - 


However one tip - I used my shade cloth as the protections between pot and pavers.  Not such as great idea - it's not exactly protective - so I now have some blue marks on the pavers that I am hoping will wash or fade away!

And after my painting project, I also decided to start on another project - the stripping of the paint on the sash windows.  I could tell the paint that was there was not very well done, as it was already lifting and cracking in places.  So I bought myself another new toy - a heat gun - and got to work.  Mind you - safety first - I got a respirator and heat protective gloves.  And then I got stuck in.

My new toys - heat gun, plus my safety equipment - safety is very important!
The current paint job is a blue colour, but is already lifting and cracking in some places

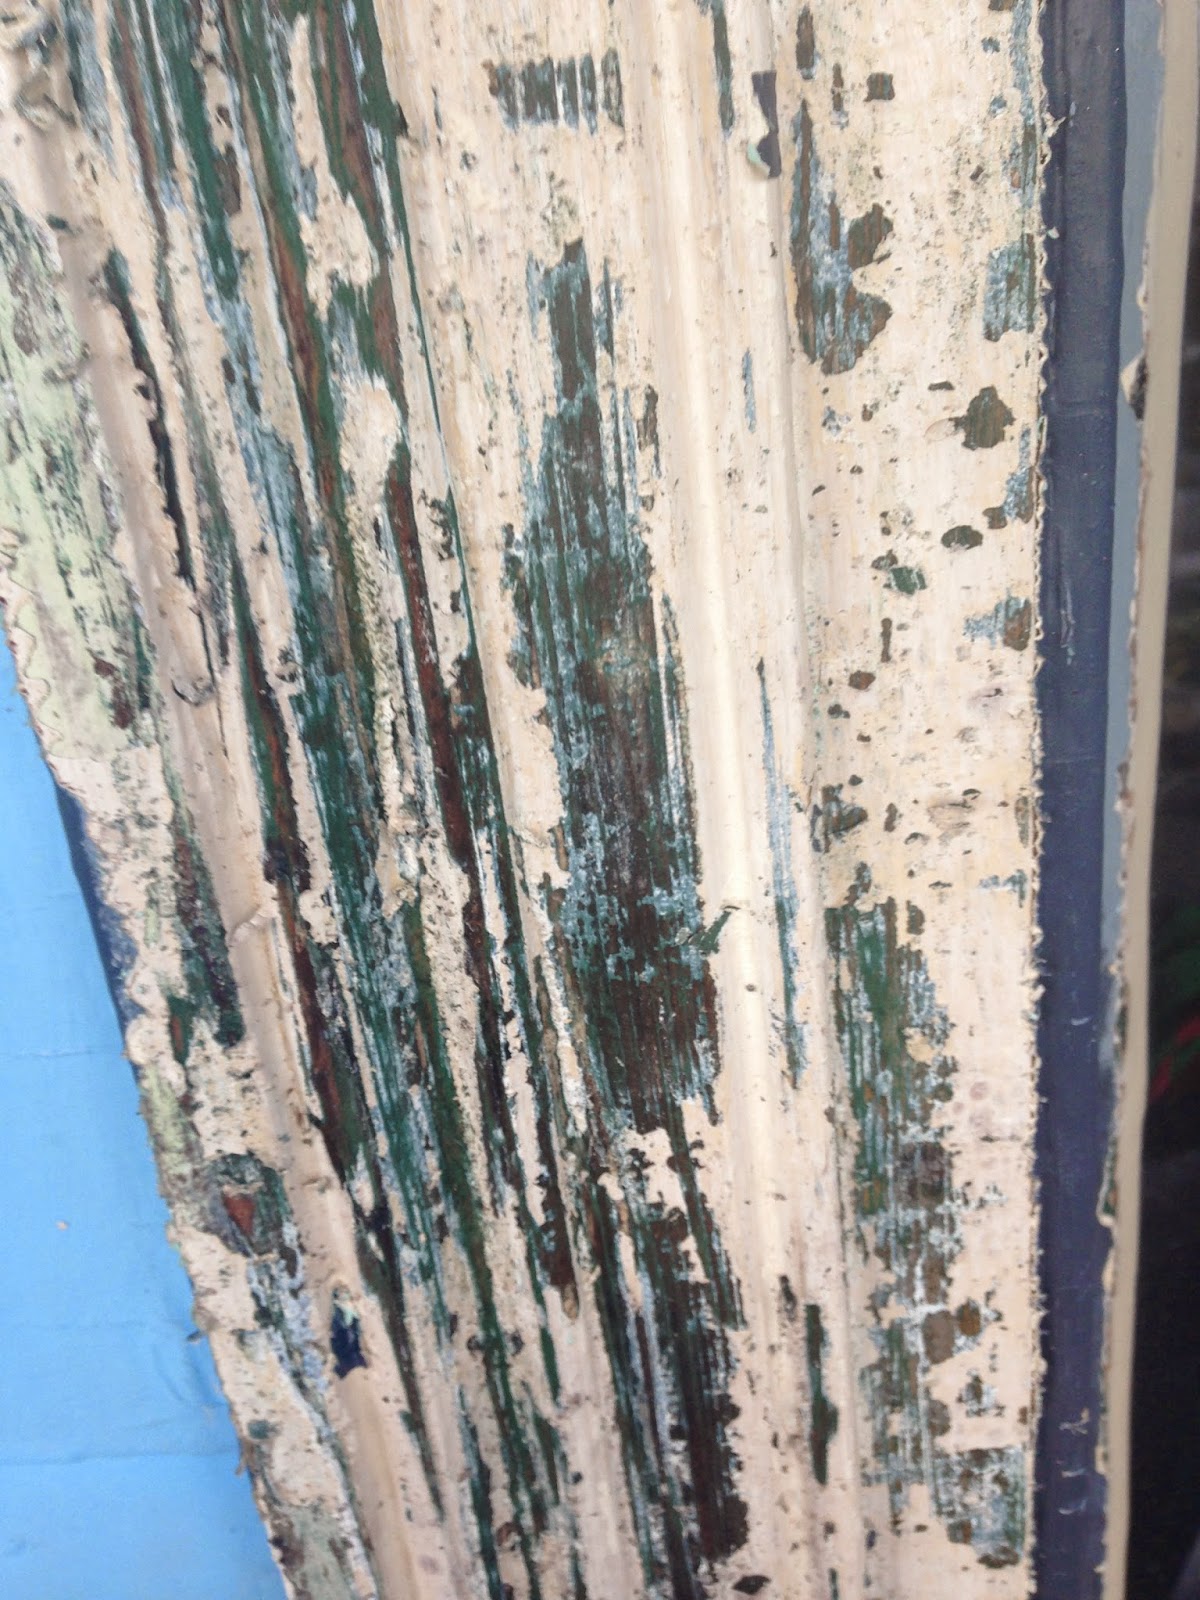
A heat gun is a magical thing!  It looks like a hair dryer but after a few passes over the paint it bubbles and softens - and can be easily scraped off.   No wonder the blue paint was already cracking - it seems like it went straight over a cream layer, which was over a light blue layer, and then a green layer - all just on top of the previous one.


So it would appear there are about four layers of paint to be stripped right back

So I haven't got very far through it yet, although this was only about 25 minutes work before it got dark.  So hopefully by Easter I can strip both windows back totally, and then repaint.  I would definitely recommend using a heat gun for stripping of paint!

And now because I promised to educate you about Cold Chisel  - here's a clip of one of my favourite Chisel songs - Flame Trees


Tuesday, 17 March 2015

My Kitchen rules (in my opinion) - part one

As I discussed in an earlier post, kitchen installation took longer than I would have ever expected!  I had thought you went to a showroom, picked some colours, drew up a plan, and maybe had the kitchen installed in a week or two.  Clearly I was wrong!

The house had a sort of functioning kitchen when we bought it, but it was definitely our plan to put in a new and updated kitchen.  I decided that this should be done before we moved in.  I had visions of moving in, and then it all being too much to unpack the cupboards again and the kitchen never being fixed up.  Many people said we were better to move in and live with the kitchen for a while, so that we got something really practical and that suited us, but with the previous owners keeping their fridge in the laundry (who knows why?) and the cupboards and cooker being grimy and disgusting I did not want to even think about that option.

This is the kitchen which was originally installed - pictures taken prior to us settling

Original kitchen which I didn't fancy keeping


So we started our visits to showrooms about six weeks before our settlement.  I thought this would be plenty of time.  The first showroom we walked into was gorgeous.  Everything was top of the line - 40mm stone tops, automated cupboards that opened with a press of a button (so you don't have to lift your arms above your shoulder!) and all other mod cons you can think of.  Then of course the big question - how much?  As I didn't really know how much kitchens cost I was a bit wary of the "what is your budget?" question - however when we were told the starting price for their kitchens was $35,000 we realised the high end was off the list for us!

Second place was still lovely, but slightly less expensive.  However, they imported all their cupboards from France (or perhaps Germany) and so the earliest they could hope to get cupboards was 8 weeks - with a probably delivery time of 8-10 weeks.  So off to the next showroom.

Finally, we found Kitchennet in Drummoyne.  We were really happy with them.  The initial visit we were looked after by a really helpful woman (whose name I have forgotten, which is bad as she was really very good at customer service!), who didn't mind us asking about the less expensive options.  Although she couldn't give us an actual price, as we were talking about the use of laminate and given our kitchen is only one row of cupboards and an island bench, they were confident we could get a lovely kitchen with relatively lower expense.

The next visit was to meet with the designer.  John was very helpful, and had actually accessed the house plan through the real estate site when we bought it - so had already drawn up some suggestions.  We were happy immediately with this plan, so could go ahead and have it drawn up fully.  Again the question of budget - I was still a bit wary and so I said we were looking at $10,000 but that we would buy our own appliances.

So the final plans were drawn up - and amazingly (or perhaps I am being cynical, but it did seem a bit of a coincidence) the quote was just under our budget - $9700.  I really do wonder if I had have said less money the quote would have fallen under that amount!

For this we got two 900mm drawer systems, 3 other underbench cupboards, plus an above fridge cupboard, pantry cupboard, and 5 other high cupboards, plus the cupboards above the rangehood. There is also an island bench with space to sit at.  All hinges are Hettich, and the drawers are soft close. Overall I was quite happy with the price and the plans.

This shows the kitchen with sink cabinets, drawers, oven (which we supplied) and one of the underneath cupboards, also on the other side you can see our island bench, which consists of drawers and a sitting area

The drawer organiser which also came with the package has been very helpful

We went for laminate cupboards, and initially we were going to have laminate bench tops. We chose white for the lower cupboards (I think the colour is Ash White) and for the top cupboards John suggested that we use a contrasting colour.  We chose a woodgrain finish, and the colour is Alaskan. We were going to use a dark grey colour for the bench tops.  When we were deciding however, we were offered a deal to use 20mm stone for the bench tops and it was only $600 more than the original quote.  We decided on Smart Stone in Marengo, however in the end this was out of stock and so we ended up with Caesarstone Raven.

You can't really tell but the upper and lower cupboards are different colours

Stone benchtops in the dark stone colour

In addition to the increase for the bench tops, we also had to pay more as I wanted a double under mount sink, and there was a slight variation for extra cupboards.  So the final amount for the kitchen was around $11,000 - including all trades and installation, and removal and disposal of the old kitchen, but not including the appliances or the sink and tapware, all of which I sourced myself.  I will write another post regarding buying of appliances and tiles, and approximate costs involved.

Tuesday, 10 March 2015

The renovation time line - part two

I have already written about the time involved with some of our renovations, including the kitchen from planning to installation, painting, and polishing the floorboards.  You can read about those processes here.  While some of this did occur at the same time (for example, we continued to paint rooms while the kitchen was being installed, and even afterwards) we did have to complete it in some order so that each trade could do their job consecutively.  

Other jobs could be done whenever suited us, and did not rely so much on other trades.  It still may be useful though for people to have an idea of what is involved, as a couple of these tripped me up a little!

1.  New skirting boards - these we bought from Bunnings (I usually would prefer to support local businesses but this was just easy and they had plenty of the profile we wanted).  I didn't realise there were so many types you can buy - different widths, profiles (the slope of the wood at the top) and probably other variables as well.  We bought pre-primed boards, and my dad has a mitre saw so was able to cut them so that we could join neatly in the corners and on the long strips.  Youtube was quite helpful in showing me how to do this!


2.  Fixing the sash windows - when we moved in our original double hung sash windows had broken panes of glass, and the sash cords were broken so they did not even open.  One of my husbands friends is a glazier - helpful to call in your mates!  He arrived on a Saturday morning to fix them for us - replacing all necessary panes of glass (I think three panes altogether) and fixing the sash cords, plus sanding them so they ran well and now open beautifully cost us about $300.  This may have been mates rates though.  
One crack can be seen in the glass panel here

The second glass window also had a crack although this is difficult to see here
One thing I did not realise with the windows is that the putty that is used to put in new panes of glass needs a few weeks to really set.  We were told to wait a month before sanding and painting.  That has now extended to almost a year!  We will get there eventually.....

3.  Hiring a skip - even this can have issues.  When you live on a narrow street like ours you do need to be conscious of taking up room in the street!  Some large skips also require council approval.  I hired one which was on a trailer, and so could be parked on the street - but it still required pre booking and trying to arrange for parking out the front of the house.  I got a lockable skip as I had heard plenty of stories about neighbours filling up skips after dark - however in the end that doesn't seem to be an issue here, as our next door neighbour has an almost permanent skip outside which he happily lets everyone use!  (haven't paid for my own skip since.....)
4.  Carpet installation - carpet is more expensive than I expected.  I had previously had carpet installed in our apartment when there was water damage, and although the insurance company had covered most of this the entire apartment had been carpeted for approximately $1800.  So when I only needed to carpet one room (although one large room, with unusual lay out) I expected it would not even cost this much.  Obviously my previous carpet had not been very good quality!  There are many different materials, basically divided into synthetic material or natural materials such as wool.  But even within each class of materials there are a large number of variables.  Carpet can range in price hugely, with a fairly cheap price being around $20-30 per square metre, but I assume it can range up to many hundreds of dollars per square metre.  You also need to be careful - often carpet is sold by the lineal metre, so be aware of your measurements and the differences in prices.


Can't really see the old carpet so well but trust me it was horrible!
The other thing I did not realise was that when you look at carpet in a showroom - that does not necessarily mean they have enough in stock to install within a short time period.  As I wanted to have the carpet installed prior to us moving in I had quite limited time available for measure and quote and then installation.  The first company I spoke to did not even bother to turn up at the arranged time for the quote.  Luckily I had already decided they were too expensive, and had been to Webber's Carpets to see what they could do for me.  Because I needed it installed the following week there were limited carpets I could choose from, however they did have a number of rolls with enough stock so that I could choose and pay a deposit on Friday and then have it installed on Wednesday.  This is not usual - generally I would say give yourself a few weeks at least to allow for quote, ordering and installation!


Lovely new carpet installed
The carpet I chose is pure wool with a cut and loop design, so that movement of furniture and vacuuming will have limited impact on the pattern.  I went for a grey colour as it is fairly neutral and will hopefully not date.  The upstairs bed room is an unusual shape, and includes the cupboards.  When calculating a price for the carpet you also have to take into account the underlay and installation cost.  In the end, our total price was around $2400 fully installed for the one room.


Wednesday, 18 February 2015

The renovation time line - part one

So one thing that I had absolutely no idea about (and still don't to some extent!) is how long things take to get done when you are renovating.  As a result I had quite a tight schedule planned, and although there were a few blow outs I was actually quite lucky that to a great extent I could get everything fitted in.  But for information that might be of use - here is the time line for what we have done so far (split posts so you don't get too bored with the wordiness!)

1. First up  - buying the house and settlement - even once you agree on a price and have all the inspections done, or make the winning bid at the auction - you have to wait until settlement date.  Generally that seems to be 6 weeks in Sydney.  We had 12 weeks at the request of the vendor, and this suited us well.  It might be frustrating not to be able to get those keys and get started but it is good to have a bit of planning time.

2.  You may be able to get access to the house prior to settlement but you need to discuss this with the agent.  We were lucky that the vendor was quite helpful and so we were able to get access to the house.  I tried to be very accommodating too with this and rather than ask for three or four different access times I organised for all my necessary trades to be present at the same time on the same day (and this amazingly came off.  Now, knowing tradies a bit better I am still amazed that this happened!).  We had a quote for the floor sanding, asbestos testing, and kitchen measurements all done about four to six weeks prior to settlement.  While vendors might be accommodating, they don't have to let you in and if you start asking for five different quotes at different times for each of your jobs I am not sure you would get very far!

3.  Kitchens take a LOT longer than I expected to be ready for installation.  I was quite amazed when we went looking for kitchens to find that 8-12 weeks lag time was common.  So that means at least 8 -12 weeks between signing up for a kitchen company and the date they can install everything.  We ended up choosing a company that made their cabinets and all components here in Sydney (rather than others we spoke to which shipped in cabinets from France or Germany - which obviously adds a time delay) and were able to offer us four weeks for the process.

4.  Apart from how long it takes to order the kitchen - the installation process takes days as well.  Depending on your situation there are the following steps -

a) - removal of old kitchen.  Stripping out of our single strip of cupboards and sink took about two or three hours.  The guy who removed the cabinets was also the electrician so this was helpful in that he could be aware of the electricity points etc.
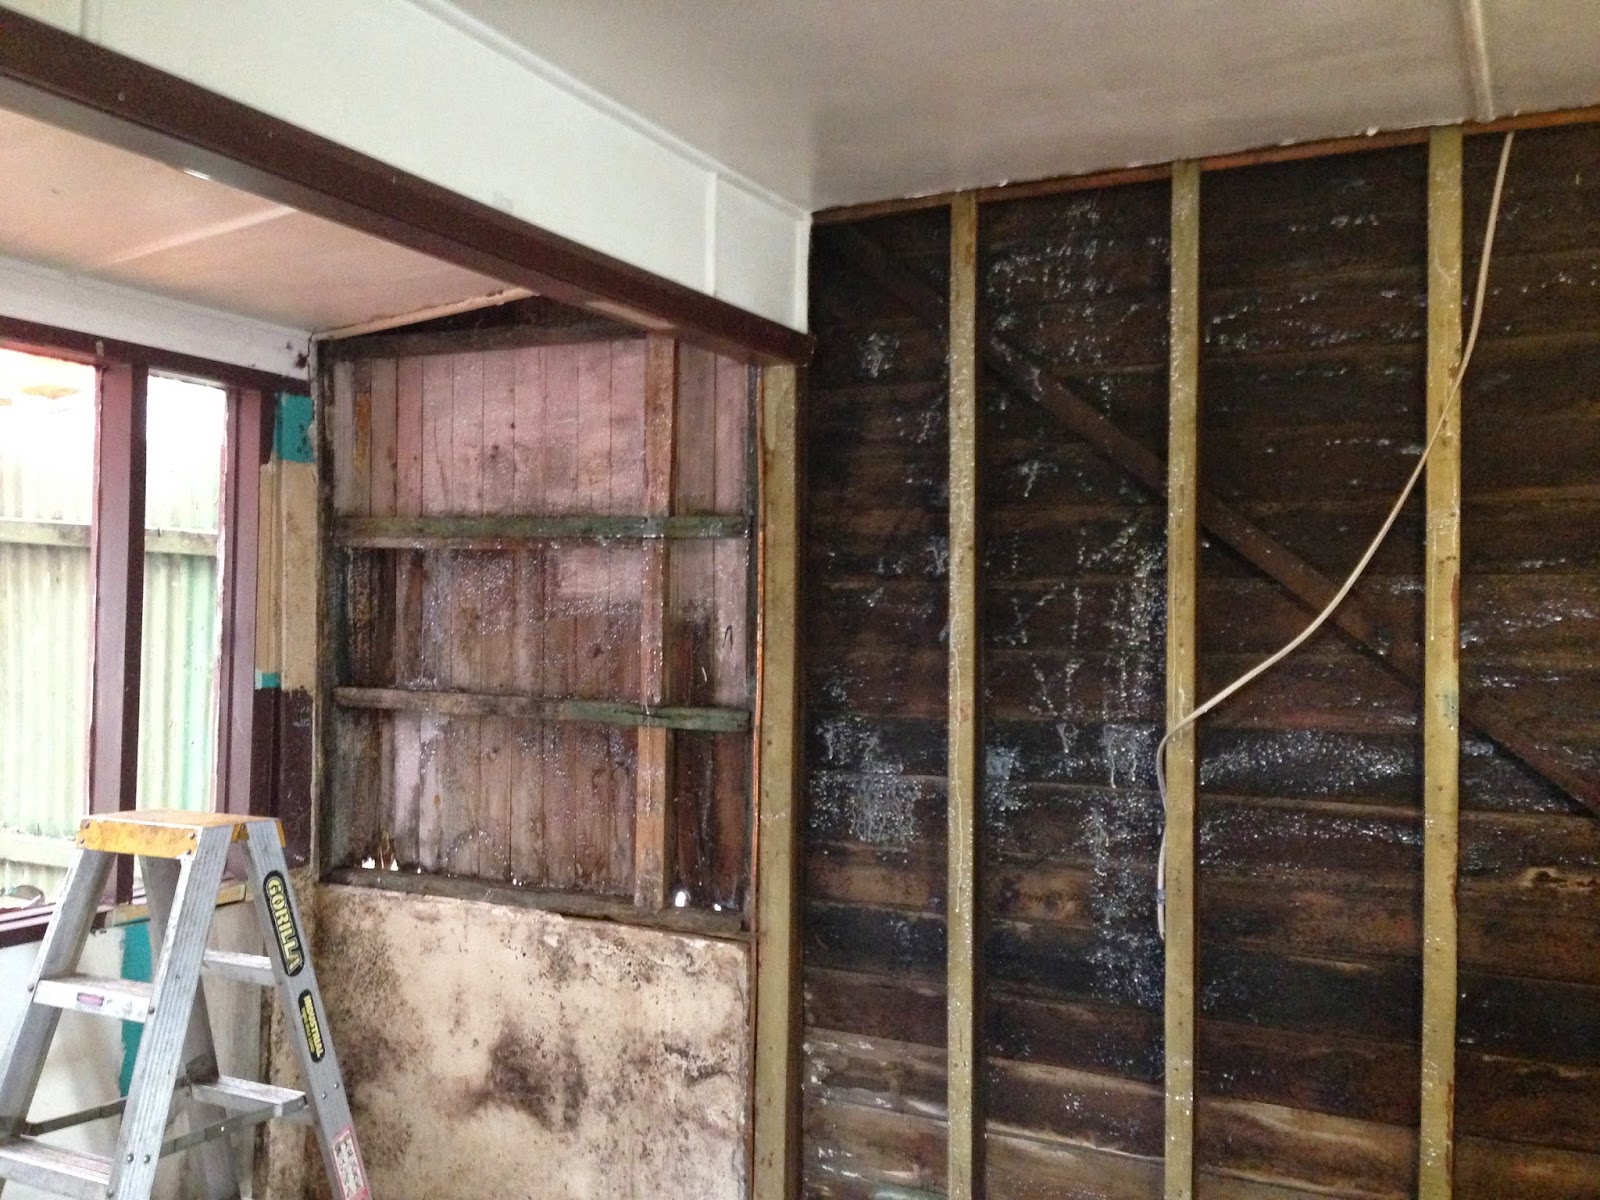
Kitchen wall after removal of cupboards - and asbestos

b) For us this is where we organised the removal of asbestos.  Since the kitchen cupboards were gone it was much easier for them to access the wall.  Asbestos removal took the best part of a full day, including the post removal testing (discussed here.)

c) - "rough in" of the electricity and plumbing - our kitchen company were really good and they arranged all the trades involved - and also co-ordinated the rough in visits.  If you organise your own trades it may be less expensive but be aware that they don't just come round once and do everything all together. Electrician and plumber both had to rough in the new plumbing and electricals.  We were lucky that without a wall, and without a floor in place (plumber was in the camo shorts here) that it was probably much easier and quicker for the trades to do their work.  For us, with a pretty small kitchen really and only along one wall the electrician and plumber both only took an hour or two each.
d) - we needed to put in a new wall - plasterer took one morning to install the wall.
New wall installed with the roughed in electric points

e) Painting the wall - we wanted to smooth and finish before the cabinets were installed.  We just painted it ourselves, which only really needed a base coat and two colour coats - so finished in two days to allow the drying time in between.


f) We also had the floors sanded before cabinets installed.  Since we were adding an island bench, it was much easier for the floor guys to be able to sand when they didn't have to go around the island.  For us, as discussed in my post on the floor sanding, we had two and a half days of floor sanding and sealing, plus the couple of days drying time.


e) - cabinet installation - you need to get them delivered first!  Ours were delivered on a Tuesday afternoon, and installed on Wednesday morning.

You need to have somewhere to store the cabinets when they are delivered - and ideally not the kitchen as there needs to be space to move around.


Cabinets installed
f) Plumbing in for dishwasher and connecting the oven occurs after the cabinets.  As before, our kitchen people organised all of the trades. 

g) Once cabinets are in the stone mason (if you're getting stone benchtops) has to come to measure up.  This can't be done before hand as needs to be very precise and dependent on the installation.  Our stone guy was good and was able to come the day after the cabinets were installed, and then the bench tops went in only a few days later.  He cut some of the holes (for sink etc) while he was on site at our house, which was possible as we have an area in the front of our house.   The stone mason will need the specifications for your cooktop too, so he knows what size hole to cut.  We bought our own appliances, but this info was easily found with the product itself.  The stone mason was also organised through the kitchen company.  We actually changed the stone we choose to a different brand as the original one I chose was not immediately available - and we were on a tight schedule!

Our finalised kitchen - plumbed in, stove, cooktop and rangehood attached.

g) Once benchtops are in, you can plumb in the sink (we had a double undermount sink which the stone mason attached initially, not sure who does the drop in sinks).  

h) Tiling for the splashback can be done next.
i) Final power points and plumbing can be finalised - and your kitchen is complete!

The time for the kitchen would presumably depend on how easily you can arrange all your trades to work together.  As our kitchen company organised all the trades this was quite easy for us.  The entire process still took approximately one and a half weeks from delivery of cabinets until final power point was completed.

Saturday, 31 January 2015

That really floored me

One of the things I liked about the house when we bought it, and something that is often referred to in real estate speak is "original floorboards" throughout.  We could see that there were floorboards in the spare room, lounge room and dining room, and although it was covered up with a fairly new looking laminate floor we were pretty sure there were floorboards in the kitchen too.  


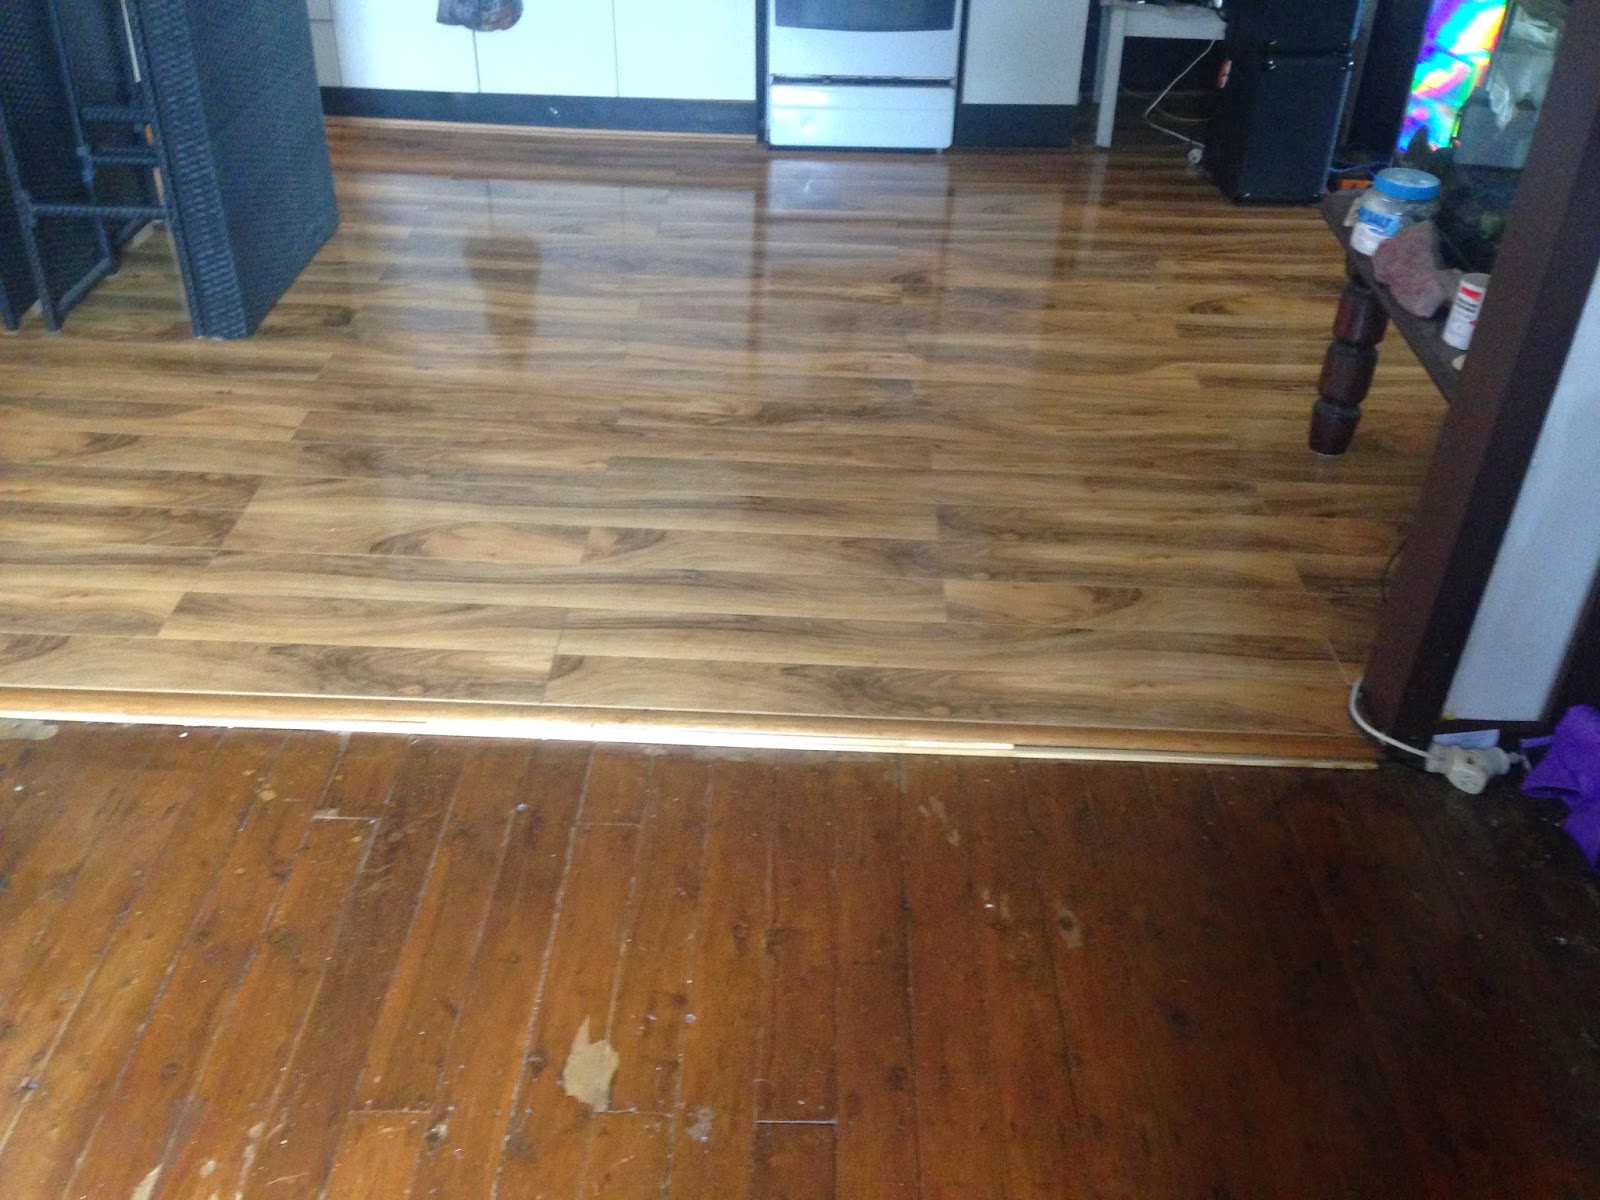
Quite a good shot to show the old floor in the dining room and where it met the new floor in the kitchen.  The high shine part was laminate type floating floor. 

The old floor boards were not in great condition and had a lot of dirt and paint but they were still sound, no breaks or holes in the boards themselves.
So we decided that it should be fairly straightforward to lift the floating floor ourselves, and we had assumed that we would find the same floor underneath.  The laminate had been laid in a fairly slap dash way, the edges were certainly not what you would call professionally finished.

As you can see some small pieces were added at the end of the floorbards and then just a strip of metal or wood nailed down to "finish" it off

This was as we started to pull it up - a lot of small pieces of wood and the boards themselves were ripped up.  
The first layer was not too hard.  The laminate flooring clicks together and also clicks apart, so with the help of a crow bar (well like a crow bar but flatter and smaller, not sure what the technical term is but I called it our lift bar) and a mallet we were pulling them up easily.  Note I said "first layer".  The kitchen guys had already measured up our kitchen and had mentioned that there was 20mm difference in floor height from one side of the kitchen to the other.  As everything in this place is so crooked we didn't think much of it initially.  Turns out, it could have been any one of the 5 + layers of flooring under there which was uneven!

Not the best focus but this shows the second layer (and our mallet) -  lino tiles.

These are lino tiles, so each square is a piece of lino which was glued down.
So second layer - lino tiles.  And who knows how long ago they were stuck down, but the glue was still pretty sticky!
We started ripping this up, which mostly just involved getting and edge and pulling.  
  
The lino tiles were stuck down onto a type of chipboard.  Note the damage around the stove, probably old water damage.

Another shot of the first layer of chipboard, with some of the lino tiles still stuck.  There was water damage around this wall as well.
The chipboard was hard to get up, it was in larger sheets and was quite heavy.  

Next layer was another layer of lino.
We were starting to feel a bit like we were unwrapping babushka dolls - a floor under a floor under a floor (and repeat).  This layer was another layer of lino, a kind of yellow colour with a pattern on it.  It was full sheets of lino, not in tiles.  It had been stuck down directly onto a third type of lino, I don't think I have any photos of that one as the glue was still quite strong and as we ripped up the yellow lino we took the other one with it.  The final layer was another layer of chipboard.  By this stage we were getting tired and cranky - what had been expected to take us an hour or so maximum was up to 3-4 hours.  And we hadn't found the floorboards yet!  But as the chipboard came up we found - 

Finally - we found floorboards!  And in surprisingly good condition, especially considering the water damage we had seen.  Maybe all the layers were good protection.

But another snag - there were only floorboards under 3/4 of the floor - the rest was this large piece of board, put down over what was probably previously a verandah.
So we finally found the floorboards - with two fairly major issues.  The biggest one was the lack of floorboards in one whole section of the floor.  Can't exactly polish up a big piece of board and hope no one notices.  We needed to put in a floor and we needed it within five days, as I had already booked the polishing in!  The other issue was the staples in the main floorboards.  Thousands of tiny little staples which all had to be removed by hand, without marking the floor.  

The first issue was solved by the company we had already booked to come and polish the floors.  I rang them in a panic to ask what we could do, and they sent me Julius.  Julius is a very deaf carpenter, who we struggled to communicate with  - but since he could see the problem fairly easily when he arrived we didn't have to explain much.  And he worked magic.  He sent my husband to buy reclaimed floor boards from a local timber place - Rozelle Recycled and Ironwood - they have a number of different timber and stone retailers there, including one that sells reclaimed boards - a great place to look for building materials.  And then Julius was able to come in to do our floor the next day, and built a floor for us from scratch.

Underneath the piece of board was only rubble, no joists or any support at all - no wonder the floor was at different heights in different places.

The joists were built with treated pine.  The rubble we removed by hand - although I didn't touch the mummified rats we found under there, those were shovelled into the rubbish!

And once it was done, you could barely see what was "new" floor and what was old.  The use of reclaimed floor boards (these are cypress pine and about 85-90mm wide) meant it blended in.

In this picture you can see a little more obviously where the floor was built - however later when it was polished you can't tell at all.
I can't speak highly enough of Julius and the fact that he saved our floor - and us!

The staples were another question.  We all took turns at trying to prise them out, and gradually removed most.

Each of those little marks is a staple, many with chipboard still attached.  I guess whoever put it down didn't plan on ever seeing those floorboards again.

I have no idea why they used so many staples.  But they all had to come out to be able to polish the floor
The staples were prised out gently using long nose pliers.  I tried other tools, particularly after requesting suggestions from my friends on Facebook.  I think my cousin gave one of the best pieces of advice when he said 

With each job there is an easy way and a hard way. You can never have enough tools. Take this dilemma down to your local hardware store find the oldest fella with the roughest looking hands and ask him for advice"
Pretty much was what I followed for the whole renovation process! (Thanks Ben)

The next post will cover the polishing of the floors - and how they came up in the end!